Showing posts with label my hobbies. Show all posts

Saturday, March 16, 2013

Angry Bird

A candidate for the flock


Do you ever play that silly little game, "Angry Birds?" Some people have it on their phones or tablets, and some people play it on Facebook. If you're familiar with the game, maybe you'll agree with me that this little fellow is a great candidate for the Angry Birds flock. His colors are pastel, but don't ignore that mean look in his eye.

Angry bird, seen at the Peddler's Mall in Hopkinsville

Tuesday, December 18, 2007

My Secret Chicken Love Affair

A collection I am resisting


Chickens on their nests

Long-tailed roostersTrue confession: I am attracted to chickens. There's nothing kinky about it. I simply admire their handsome appearance.

I've been admiring the currently-popular chicken knick-knacks ever since the fad started. At Clarksville yesterday, I saw some nice tributes to chickens at Hobby Lobby, but I resisted buying any of them. I didn't even look at their prices. I just took their pictures.

I've only had real chickens once in my life, about 32 years ago or so. I was working at Empire Gas of Hermitage, MO, and I rented a little mobile home near there from a lady who wanted to move back to Kansas City.

Chicken at Hobby LobbyMy landlady had about a dozen chickens, which I inherited when she moved out and I moved in. My favorites were the black-and-white speckled ones. I think they were Barred Plymouth Rocks.

My boss liked my black and white chickens, too. He was always wanting me to bring in some of their little speckled fuzz-feathers so he could make them into fishing flies. He had a spell of good luck catching crappies with them, and he always hoped to repeat that success.

Made in China chickenYou can see a couple of good drawings of Barred Plymouth Rock chickens at the Oklahoma State University Animal Science website. Another good photo has been uploaded to Mother Earth News by Robin Arnold of Port Clinton, Ohio.

At the blog, "Thoughts from the Middle of Nowhere," Sarpy Sam sometimes posts some good photos of his Darling Wife's chickens. You can find them by visiting the Sarpy Sam's photo archives and typing "chickens" into the archives. (You'll find many beautiful photos of Montana ranch country there, as well.)

Though I like chickens, I don't think I'll probably ever own another flock of them, real or otherwise. I am not that excited about the responsibility of taking care of them, and really, we don't use too many eggs.

The family got me a nice large rooster with metal tail feathers last Christmas. Unfortunately the cats knocked him off his perch, and his body, which wasn't metal, shattered.

Another Chinese chickenI do have a set of rooster salt and pepper shakers which Keely gave me, and a hen-on-a-nestegg bank that my friend Cynthia gave me a couple of years ago. However, I refuse to start a serious chicken collection. I have plenty of collections already.

Monday, October 15, 2007

Another Table Decor Idea

Perfect favor for a Valentines Day party


At the LWML luncheon last Saturday, one of these spoons was placed at each table setting. Purple and gold are the LWML colors, so they were made with yellow net and purple ribbon. Each spoon held three Hershey's kisses. I can certainly imagine them made with red net, a white ribbon, and a Valentines Day message on a heart-shaped tag.

Saturday, September 29, 2007

Triple Decker Rice Krispies Treats

Rice Krispies Bars, fancied-up a bit


Here's an idea for Rice Krispies bars. I often make these for church potlucks because
1.) it makes a big batch,
2.) people like them, and
3.) it's relatively easy.

Coat an extra large baking dish with no-stick cooking spray. (I use a 4.8 quart, 10x14" Pyrex pan.) Make a batch of regular Rice Krispies Treats, and press it evenly into the bottom of the pan.

Make a second batch, substituting either Fruity Pebbles or Cocoa Krispies for the regular Rice Krispies cereal in the recipe. Spread and press it evenly over the bottom layer.

Then make a third batch of regular Rice Krispies Treats, and spread and press it over the colored layer.

Last step: Melt a couple blocks of white candy coating (sometimes called "almond bark") and drizzle it over the top of the Treats with a fork. Then add a final bit of pizazz with some color-coordinated cake sprinkles.

Who knows? A similar recipe may be on the Rice Krispies site. I've never looked! However, I did come up with this idea myself, even if someone else did also.

That's what I'm doing this morning, plus baking bread, fixing a large bowl of cole slaw and making a fruit jello. Those are my contributions to the church potluck tomorrow. I'm just taking side dishes because the church is supplying chicken and ham, and since we live about 25-30 minutes from church, I like to take foods that aren't likely to slop out of their pans.

I also need to vacuum this morning because Keely and Taurus are coming to eat a late lunch/early supper. We're having roast beef. It's a busy day, and I'd better get with it.

Sunday, September 02, 2007

Life Pictures by William B. Dyer

Illustrations for the poems in Riley Love-Lyrics


Over four dozen "Life Pictures" by William B. Dyer (1860–1931) illustrate the book, Riley Love-Lyrics. For this post, I've scanned nine of the Life Pictures of women, but men, children, nature, and still life are also represented in the book's images.

Riley Love-Lyrics, a book of love poems by James Whitcomb Riley, was first published in 1883. My copy of the book is the 1905 edition. I don't know if early editions of the book included the Life Pictures, but I don't think so. William B. Dyer would have been only 23 years old in 1883.


By the turn of the century, cameras and film had advanced enough that photographs could be natural, casual, and expressive, rather than contrived and stiff as in the past. The Life Pictures are experiments with photography as an art form.

I had a hard time finding much information about William B. Dyer. The following paragraphs piece together many scraps of information that I gleaned from more hours of search than I should have invested!

Dyer was a native of Racine, Wisconsin. He moved to Chicago in 1894 at the age of 34, and he worked there for 10 years. Like James Whitcomb Riley, he was a Midwesterner. I don't have any other information about how he spent his life, except that he was a pioneer of modern photography.

I found the following few phrases of information about William B. Dyer in an antique book seller's description of Riley Love-Lyrics. These exact words are repeated on many book-selling websites:

William B. Dyer became a professional photographer in 1897. His first and only solo illustrated book was the above title [Riley Love Lyrics]. He was elected a member of The Linked Ring, championed by Clarence White to Alfred Stieglitz and published in Camera Notes and Camera Work.

Source: Book description on cahanbooks.com


On the Internet, Dyer's name often appears in association with Alfred Stieglitz who was (among other things) the editor of Camera Works. a journal published from 1903-1917. The journal brought publicity and respect for the photographs of Steiglitz and other early photographers whom he admired and published.

Stieglitz published two of Dyer's photos in Camera Works and at least one photo in Camera Notes. The Stieglitz papers include correspondence with Dyer. I am unable to determine the extent of their acquaintance with each other.

The Metropolitan Museum of Art (MMA) included a chapter about William B. Dyer in their 1978 catalog , The Collection of Alfred Steiglitz: Fifty Pioneers of Modern Photography. This book is a catalog of the museum's collection and a reference volume about early photography.

If you have access to JSTOR (perhaps through your library,) I believe another article about Dyer is available there.


The Princeton University Art Museum owns a collection of Dyer photographs. I found only three examples of Dyer's photographs online, so this post will quadruple that number. Bear in mind that these are scans of pages printed over 100 years ago -- the original photographs probably didn't have the sepia tones.


Related post: James Whitcomb Riley and Me

Saturday, August 04, 2007

A Clutter Battle Fought and Won(?)

Cleaning out and re-accumulating


Casper The Incorrigible had a good time, early this morning before anyone was out of bed. He found the bottom door of the china cabinet open, so he explored that forbidden compartment while he had a chance.

To get in there, he had to push aside a stack of assorted foam and paper plates and plastic cups and tip over several tall flower vases. Most of this ended up on the floor in front of the china cabinet.

Somehow, picking up Casper's spill of paper plates and vases morphed into cleaning the china cabinet top to bottom. I "Windexed" the glass shelves and "Pledged" the wood. Then I rinsed the "china" and dried it.

This sounds so simple when I write it, but it took quite a while. I decided to pack away a few things I don't use much, donate a few things to our upcoming church garage sale, and reorganize the rest of it.

In the process, I decided that I don't need much more Anchor Hocking Early American Prescut (EAPC). I inherited my mother's 1960s glassware of this pattern, and I've collected it since then, thinking that I'll give each of my children a set when they set up a stable home. Thus I have two of many pieces -- or you might say, too many pieces!

I packed up the dishes and some other stuff for the church garage sale, and Isaac and I went to town to run some errands. We dropped off the garage sale items at church, and I must say, I was feeling quite virtuous about cleaning my china cabinet and getting rid of a whole box of clutter.

Then we went by the library and used the computers. When our time was up, Isaac went to look for some books. While waiting for him, I accidentally strayed into the magnetic field of the donated-books closet. I do have a terrible weakness for books, especially old books.

I only bought three, and they are in exceptionally nice condition -- well worth the $1.00 each I paid for them. They are:
  • The Poems of Eugene Fields (with an ancient strip of paper marking the page with the poem, "A Valentine"
  • Leaves of Grass (Carl Sandburg)
  • The Works of Robert Louis Stevenson

And I suppose I should confess that I bought an old book at the library on Thursday of this week, also:
  • American Notes by Rudyard Kipling
That's one box out, and four books in. Am I making progress in the ongoing battle against too much stuff? Not really, but at least the china cabinet is nice and clean.

Friday, August 03, 2007

Fannie Merritt Farmer and Her Cookbook

Upon finding three early versions of my favorite cookbook...


Today I discovered several online volumes of Fannie Farmer's cookbook: the original 1896 edition, the 1911 edition, and the 1918 edition of The Boston Cooking-school Cookbook. Finding them was like running into a dear friend unexpectedly -- a really nice surprise.

Fannie Farmer and Me


My cookbook collection takes up a couple of bookcase shelves, but my Fannie Farmer cookbook is my all-time favorite.

My mother had a copy of The Fannie Merritt Farmer Boston Cooking School Cookbook (10th edition) which I used sometimes, when I was growing up. Later, when I had a little place of my own, I bought my own copy, the 11th edition, which was named The Fannie Farmer Cookbook.

I turn to Fannie Farmer every time I make cornbread, baking powder biscuits, pancakes, waffles, ginger snaps, brownies, and more. In the previous sentence, I linked to the recipes in the 1918 cookbook; their ingredients are similar, but not identical, to the recipes in my 1965 cookbook.

Some of my favorite Fannie Farmer recipes -- applesauce spice cake and peanut butter cookies, for example -- aren't in the 1918 edition. Those recipes were apparently added by her heirs. Her immediate family did early revisions, and later, her niece by marriage, Wilma Lord Perkins, revised several editions. Perkins writes in the preface of the 11th edition about upholding "Aunt Fannie's" standards of clear, dependable, basic recipes.

Marion Cunningham took over in the late 1960's as the reviser/author of Fannie Farmer cookbooks. It's now in its 13th edition, completely rewritten with many new recipes, but personally, I don't intend to buy it. I'm going to stick with the edition I know and love.

I have the Fannie Farmer Baking Book by Marion Cunningham, and it has not become a favorite of mine, though I've tried to give it a fair chance. I admit I may have a bit of attitude. Some cooks think she's done great things with the Fannie Farmer cookbooks.

Who was Fannie Farmer?


Fannie Farmer (1857-1915) was a pioneer of scientific cookbook writing and the study of nutrition. In her recipes, she used standardized level measurements -- cups, teaspoons, tablespoons, etc. -- rather than the lumps, pinches, dabs, and dashes common to recipes of her era.

In the two decades after her cookbook was published, she saw it reprinted nine times. She surely would not have guessed that 110 years later, it would still be in print and considered a masterpiece and a classic.

Fannie Farmer's life


Fannie suffered a stroke when she was only 16 years old. She was unable to walk for several years and she was unable to complete the college education she had planned. Though she learned to walk again, she always had a limp.

During her years of recovery from the stroke, she became interested in food preparation. When she was about 30 years old, she enrolled in the Boston Cooking School, a school for professional cooks, where she became a star pupil, an assistant, and finally, the school's director. Thus the title of her cookbook was the Boston Cooking School Cookbook.

Later she started a cooking school for housewives, Miss Farmer's School of Cookery. She wrote a book about proper nutrition for sick and handicapped people and became a lecturer on that subject at the Harvard Medical School, as well as running her own school, writing a newspaper column on cookery, and authoring several other books.

As a young person, Fannie Farmer had red hair. She never married, and she died when she was only 57. She suffered another stroke that paralyzed her legs again, but she continued working from a wheelchair, giving her last lecture just ten days before her death.

A note from Fannie Farmer


My Fannie Farmer cookbook was revised and updated by her niece, Wilma Lord Perkins, but it still has a foreword from its original author. I quote a paragraph from it:

At the earnest solicitation of educators, pupils, and friends, I have been urged to prepare this book, and I trust it may be a help to many who need its aid. It is my wish that it may not only be looked upon as a compilation of tried and tested recipes, but that it may awaken an interest through its condensed scientific knowledge which will lead to deeper thought and broader study of what to eat.

-- FMF
Yes, Fannie, the book has been a good help to me every time I needed its aid.

Fannie Farmer and my daughter


My Fannie Farmer cookbook isn't in very good condition. It's well-worn, inside and out. Some of the most damaged pages are the ones with Keely's favorite recipes. She learned to bake from this book.

A few years ago, I found a nice clean copy of the 11th edition on eBay, bought it, and gave it to Keely. It has all her favorite recipes, so she was delighted to get it. She's been using it, she tells me, and impressing people with how she can cook and bake.

I also bought a fresh copy of the 11th edition for myself, but I haven't used it. I'm fond of my old Fannie Farmer that opens to all the right pages automatically. I think of little Keely every time I open it!

Sources:
Fannie Merritt Farmer Biography
About Fannie Merritt Farmer
Fannie Merritt Farmer at Wikipedia
Fannie Merritt Farmer
Fannie Merritt Farmer, Mother of the American Cookbook
Fannie Farmer Biography
Seven centuries of cookbooks - treasures and pleasures

Technorati tags: , , , ,


Tuesday, July 17, 2007

Sources for Color Palettes

Masterpiece color palettes


Whether it's your home, a brochure, a quilt, or a website, color is an important part of the design. It will have a tremendous influence on the final appearance.

One way to find a set of colors is to use a palette generator. Give it the URL of any Internet image, and it will produce a palette of colors. It doesn't get much simpler than that.

Color Inspiration from the Masters of Painting, a post on the Colourlovers blog suggests taking a color palette from a famous painting that you like.

The article includes some nice color combinations extracted from famous paintings by Van Gogh, Picasso, etc. (If you register, you can download the palettes, and vote for the ones you like by clicking the little hearts.)

Somehow, it sounds a little more sophisticated to say your palette is taken from a Rembrandt painting rather than produced by an Internet palette generator. And remember -- you can run the Rembrandt through the palette generator and see what colors come out.

The idea of finding a palette of colors in a painting appeals to me because
Running the Monet through the palette generator, here's what I got:


I don't think the palette generator does the Monet justice. The colors it found are so gloomy! That painting doesn't seem gloomy to me. Here's my human selection of colors from the same painting:


Technorati tags: , , , ,

Wednesday, June 27, 2007

Using the Little Linux Computer

My Various Hobbies


The Win-XP computer is at the shop, so I'm writing from the little Linux computer in the back hallway tonight.

It's a small workspace, but pleasant. The desk is long and narrow to fit its space. I can see myself in the mirror at the other end of the hallway. I'm sitting on my straight-backed chair with a rosy paper lantern overhead and Casper curled at my feet.

Currently, Stevie Ray Vaughan and Hank Thompson are taking turns singing in my ear. Next up is the Blackwood Brothers. The selection of music on this computer is limited, but enjoyable to me. (I chose it all.)

Linux mascotThis little Gateway computer used to have Windows 98 on it. When Microsoft stopped providing security updates for Win-98, I decided to install Ubuntu. Ubuntu is a free operating system, one of many varieties ("distributions") of Linux, all of which are free.

Linux is supposed to be a more stable and secure system than Windows -- that is, it rarely crashes and rarely needs rebooting, and it resists viruses. Many big commercial and government computers (often called "servers") use Unix which is sort of a big brother to Linux.

A helpful Linux user (a local person) coached me on partitioning the disk and installing Ubuntu. He even had me bring the computer to a high-speed internet connection in his office so I could download a bunch of stuff he thought I needed. (We can't get DSL where we live. Our telephone lines aren't good enough.)

I haven't learned many of the details of Linux yet, but that's my own fault. A tremendous amount of information is available on the internet. I've even been given at least half a dozen books about Linux. I just haven't been interested in studying it deeply.

Mainly, I use this computer when Isaac wants to play games on the other one. I type up some recipes or get on the internet. I didn't need to study how to do those things. The programs worked just as one might logically expect.

The Win-XP computer is still the computer of choice in this house, but I'm glad we have this one as a backup. Linux has extended its useful life.

Technorati Technorati tags: , ,

Tuesday, June 26, 2007

Construction Adhesive

My Various Hobbies...


Hands coated with construction adhesive

Today, I got a lot of construction adhesive on my hands, but I made good progress on the shop table I'm building. It's turning out to be a workbench rather than a table because I decided to make it narrower.

I thought about photographing my progress but I have such a mess in my workspace. I'll post a photo later when I get the table finished, the floor swept, and the tools put away.

I am still puzzling about the warped 2x12's that I want to use for the top. I have three boards to choose from. One is not warped. The other two are so twisted that when three corners touch down, the fourth corner is nearly an inch in the air.

I originally thought that I would use two boards lengthwise. Now I'm thinking about cutting the boards into shorter lengths and laying them crosswise. Short boards can't have as much warp as the 8-foot boards do!

I don't think that running the boards crosswise will affect the sturdiness of the bench at all. The bench is extremely solid (thanks to lag bolts and construction adhesive and a whole bunch of nails and screws.) It is the most solid thing I have ever built. I expect it will last at least a couple of centuries.

Of course, I could go to town and buy a new 2x12 that's not warped, but that would defeat one of my purposes for this project -- to use up a lot of scrap lumber.

I could finish up in just a few more hours. I wish I could get it done tomorrow, but I must work in my garden tomorrow morning, and tomorrow afternoon is booked too. Maybe Wednesday.

Bar

Related post: The Wood-Working Woman Wields Her Tools

(That title sounds so much nicer than "The Wood Butcher Strikes Again", don't you think?)

Technorati Technorati tags: , , ,

Saturday, June 23, 2007

How to Patch the Knees of Jeans

Repair a hole in fabric


If you have the time to do it, a neat patch on a damaged garment returns it to useful service, saves you money and gives you a nice glow of pride in your handwork.

Here are the basics of repairing a worn out knee with a patch that is hemmed on both sides. These same ten steps can be used to patch a hole in virtually any fabric item.

1. Following the threads in the denim, cut off the frazzled edges so that the hole is square or rectangular in shape.

2. From an old pair of jeans, cut a patch that is one inch larger on all sides than the hole you are repairing. The edges of the patch should follow the threads in the cloth. Cut a 1/4-inch square out of each corner of the patch.

3. Put the patch inside the jeans leg and center it beneath the hole. Be sure the right side of the fabric is showing through the hole. Pin it securely.

4. Baste the patch in place, running the stitches about 3/4 inch from the edge of the hole.

5. From the right side of the knee, make a 1/4-inch diagonal cut in each of the four corners of the hole. (See image below.)


6. On each side of the hole, fold the fabric to the inside. Baste the folded edge to the patch.

7. Turn the jeans inside out. Remove the basting stitches from the outside edge of the patch.

8. Fold the edge of the patch under on all four sides. Baste the folded edges to the jeans. (See image below.)


9. Press the patch smoothly, lifting the iron up and down rather than sliding it across the fabric.

10. Stitch the edges down on both sides by hand with a hemming stitch, or sew around all edges with your sewing machine. Remove all basting stitches.

When my children were young, I bought a lot of their jeans at garage sales. Often I found jeans that were in excellent condition except for holes in the knees. I bought them for a small price and patched them. It was a good way to save a lot of money.

Tuesday, June 19, 2007

The Wood Working Woman Wields Her Tools

My Various Hobbies...


My shower felt really good tonight. I've been working out in the shed. I was sticky with sweat, powdered with sawdust, and smeared here and there with construction adhesive.

By the way, you can remove construction adhesive from skin with vegetable oil and the dish-scrubby (the one that is knitted from plastic string.) This probably works best if the adhesive is not completely set up.

Shop Table from Scrap Lumber

lag boltI'm trying to build building a shop table. I have several plans that I've printed off the internet and clipped from magazines. All of them require a bit more skill than I have, but what I lack in skill, I will make up with lag bolts and construction adhesive.

Part of the motivation for this project is to use up some of the lumber odds and ends and scraps that are piled around the shed. (Then I can buy some nice lumber when I want to build something else.)

Coping With Warps

We have a warped 2x12 that must have been 28 feet long. It was purchased by the carpenters who built the shed for us. Why? It should have been refused at the lumberyard, but here it is at our house, left over because it was too warped to build with.

I cut it into three 8-foot chunks, thinking I'd use them for the table top. They are so twisted that they don't lie together nicely. Maybe I can shim them enough to fasten them down securely on each end and then rent a power planer to smooth out the top.

I cut the pieces for the legs from 2x4's and started trying to glue them up, but they are warped too. It's driving me crazy. I finally got one leg glued and screwed together with its cross members built into it. If I hate that fabricated leg when I see it tomorrow, I'm going to make the legs from 4x4 scraps instead (no piecing together needed.)

Slow and Not Very Steady

You can't imagine how slow I am when I try to make something. Out of every hour, I swear, I spend at least half of it in heavy pondering. Another 25 minutes goes to false starts, mistakes, tool searches, and measuring a million times. Any real progress is made in the remaining five minutes.

I might have this very simple table done by the end of the week, or I might not. If I do, it probably won't look much like the original plan.

Technorati Technorati tags: , , ,

Friday, June 08, 2007

Me? Band?

My Various Hobbies... Not Easily Classified...


As Mom has said, I was in choir for all of high school, and also for two years in middle school (Sixth grade choir was not offered at the school I attended). Also, I took piano lessons for longer than I care to think of. So you can say that I've had musical experience.

Taurus was fixing the computer of some friends of ours a couple of days ago, and I was over hanging out in the meantime. In typical me fashion, I was singing to something in my head, and the friends we were visiting overheard me. They decided executively that I should sing back up in their band. They later also made the executive decision that I should play my lap harp on several of the songs.

So, apparently I'm in a band. And by band, I don't mean like six teenagers who practice in their parent's garage. This band actually gets gigs and payed for stuff and such. It's even a pretty good band. The songs are pretty decent and all original.

And I'm going to be on a CD. Like a real CD. So I have kind of mixed feelings about this whole thing. While I have spent a lot of my life singing, there is a difference between singing in a choir of 120 people, and singing with one other person. Also, there is the nagging fear that I am not doing it right/somehow offending the lead singer/guitarist/author (all of which are the same person).

However, it is pretty cool. And, I'm trying to figure out how to put this on my resume, even though I'm not really sure what this has to do with virology. Unless they decide that they want to throw a lab musical, in which case I'm the woman for the job.

Technorati Technorati tags: , ,

Saturday, May 12, 2007

My Experience with Tomato Cages and Stakes

Growing tomatoes vertically


I prefer to grow tomatoes in a cage or tied to a stake or trellis (rather than letting them sprawl on the ground) because:

  • I have trouble with bermudagrass and it can get started all too easily in areas I can't see, such as under vines.
  • Our summer weather is very humid. The fruit gets better air circulation when the plants are off the ground and the fruit rot problem is greatly reduced.
  • I can plant twice as many tomatoes in the same space if I stake or cage them. (In fact, you can grow all the tomatoes you can eat in a strip that's six or eight feet long if you grow them vertically.)

I have bought tomato cages several times, so I have several different sorts. I took a good look at them yesterday and I can offer some advice about judging their quality when purchasing them. Look at how many rings they have as well as how many legs they have.

  • Best: 4 legs and 4 rings
  • OK: 3 legs and 4 rings
  • Weaker: 3 legs and 3 rings

Even with 4 legs, I usually put a stake through the cage to help steady it as the plant inside grows. A big tomato plant with lots of fruit is heavy. When all that foliage gets soaked in heavy rain and the ground goes squishy and maybe the wind is blowing too, the tomato cage can tip to one side.

Tomatoes on the vineI always grow my pepper plants inside tomato cages, but I don't always use tomato cages for my tomato plants. This year, I'm going to stake the tomatoes. I have planted each tomato by a steel fence post. As the plants grow, I'll weave twine around a plant, around a post, around the next plant, around the next post, etc. If I remember to add some twine about once a week, it works well.

Steel fence posts are the ultimate tomato stake. The longest ones are five feet tall in the ground, maybe a little more. You can count on them to stand firm, no matter what the weather or the plants do. They have handy notches on one side that keeps your string from sliding down, and they're reusable for a couple decades or more.

You should also buy a fence post pounder. It's a heavy steel tube with handles, closed on one end, that slips over top of the fencepost. To drive the post, put the pounder in place and then raise it a little and let it fall to whack the post into the ground. It is vastly easier to use a fence post pounder than to drive the fenceposts with a sledge hammer.

When it's time to pull up the fence posts, they are much easier to remove when the ground is thoroughly wet. Just "wee-waw" them in all directions, and they'll come right out.

Related posts:
My Vegetable Garden
A Composter but not an Organic Gardener
Tomatoes Someday

Technorati Technorati tags: , , , , ,

Sunday, May 06, 2007

Simple Bird House

More About Birds and Animals... My Various Hobbies...


Wren house

Here is a simple bird house that I made last winter from some wood scraps.

This nestbox was made to wren specifications. Yesterday, I watched a pair of wrens carrying many small sticks through the door. They were working hard. I was surprised what large twigs they carried.

I have used the same basic plan to make several bluebird houses over the years. I have two up now. They are mounted on tall steel fenceposts, and bluebirds are nesting in them.

What's the difference between a bluebird house and a wren house?
1. The size of the entrance hole
2. The area of the floor
3. The distance from the entrance hole to the floor

Many webpages provide information about the birdhouse dimensions to use for various birds, so I won't go into all that, but I do want to share this handy cutting diagram that you can adapt to any size of nest box.

Birdhouse cutting diagram
This design uses two scrap pieces of wood. One piece should be a couple inches narrower than the other. Make each side piece at least one inch longer on its longer side than on its shorter side, so the roof will slant enough to drain water. Make the back at least three inches longer than the longest side measurement.

The easiest way to make the entrance hole is to drill it with a spade bit. If you don't have the right size of spade bit, you can drill many tiny holes around the circle and then cut it out with a jigsaw blade. (Wrap tape around the end you hold.)

To make the birdhouse, nail the four walls together. I hope you can see how the walls fit together from my not-too-good sketch at left.

Then measure and cut the bottom. Don't worry if the bottom doesn't fit perfectly tight as long as a bird wouldn't get its foot stuck in the crack. Also drill a small drain hole (smaller than a bird's foot) in each corner.

Last, attach the top with a hinge. The birdhouse in the photo has two strips of scrap leather as hinges. I bent a piece of light aluminum and stapled it over the back of the birdhouse lid to prevent rain from driving in there. The aluminum also covers the leather hinges.

I didn't have a hook on hand for the front of the lid, so I used two little screw eyes and put a twist tie through them.

A few more tips:
  • Don't use exterior plywood or pressure treated wood because of the chemicals they contain.
  • Don't paint the inside of the birdhouse.
  • Let any paint on the outside of the box age a few months before giving the house to the birds.
  • Use a rasp, nail, or awl to scratch the wood horizontally inside the box below the entrance hole. Rough wood supposedly helps the baby birds get a toehold when it's time for them to leave the box.
  • Secure the box to its post at both top and bottom. If you are using a wooden post, you can put use screws, or if you are using a metal post, you may need to wire it to the post. Either way, drill the holes before you take the house to the post, and the job will be much easier.


Technorati Technorati tags: , , , , ,

Tuesday, January 16, 2007

Palettes I've Collected

My Various Hobbies...


Usually, I don't find any interesting $1.00 books in the Dollar Tree, but I did find one once. It was The Perfect Palette by Bonnie Rosser Krims. At the time, I was repainting my bedroom, the hallway, one of the bathrooms, the kitchen, etc., so it was interesting to look through the various color combinations in the book and imagine them in my home.

Each of her palettes has three colors. Some of the palettes in the book are illustrated with photographs of a room done in those colors. Other palettes are illustrated with paintings that contain those colors.

Since then, I've collected various tearsheets, scraps, etc. of color combinations that I like and tucked them into the Perfect Palette book. The palettes below are taken from them.

If I were ever going to actually use them in a room, I suppose I'd have to refine them a little. Meanwhile, collecting a new palette every now and then is another of my odd but cheap and harmless hobbies.


PaleteFrom a photo of a flowering vine against the sky


PaletteFrom a gift bag


PaletteFrom a photo of a grapevine
on the front of the church bulletin


PaletteFrom a painting of iris in a magazine ad


PaletteFrom a magazine ad for carpets


PaletteFrom a scrap of cloth


Recently, I added a Palette Grabber extension to my Firefox web browser, so when I see a set of colors online that I like, I can collect and save the palatte. Apparently, I'm not the only person in the world with this curious interest.

Technorati tags:


Monday, November 20, 2006

Shelving I Built

My Various Hobbies... Chores and Duties...


Shelves I built

The new shelves in our shed, pictured above, are my handiwork. They're made with 2x4 uprights, 2x3 shelf supports, and 1/2 inch plywood, all held together by decking screws. I had the lumber yard rip the sheets of plywood in half for me.

I built the set of shelves on the left last summer, and I just got finished with the other set.

A real carpenter could probably have put these together in a few hours. I built the first set in one day, but it took me a couple of days to build the second set around the two windows. I had to contemplate a while between some of the construction steps. I also had to do some extra bracing.

Even though my techniques are rather primitive, I try to keep it neat and square and make it sturdy. I enjoyed doing the woodworking. That's why this post fits into the category of "my various hobbies."

I should add that if I had to use hand tools, I wouldn't be so enthusiastic. Power tools are wonderful.

The "chores and duties" part of this post pertains to the job of organizing all that junk, hauling it up the ladder and putting it in place. My extra canning jars are on the top shelf at right. (Yes, the entire shelf, except for the fishing poles.) I washed them all and repacked them before putting them up there. Oh, the virtue of it all.

At least the shed is nice and neat, even if my house became a wreck while I was working on the shed!

Technorati tags:


Thursday, November 16, 2006

Mashed Potatoes for Thanksgiving

All In The Family... My Various Hobbies...


Today's Miami Herald has an interesting article and basic recipe for mashed potatoes. I have never followed a recipe to make mashed potatoes, but I did get a couple of ideas from the article -- using russet potatoes and stirring in buttermilk.

Dennis would rather have plain boiled potatoes, but on holidays he is outvoted about whether the potatoes should be mashed.

I like to mash them with an old fashioned potato masher. The lumps don't bother me at all.

Technorati tags:


Wednesday, September 27, 2006

Sewing Links

My Various Hobbies...


This link leads to an article that contains a number of useful and interesting sewing links. I'm posting it for anyone who likes to sew and especially for Trixie who is getting back into sewing recently.

Sew Now What

Sunday, August 27, 2006

My Coleman Forester Tent

My Various Hobbies...


Coleman Forrester Tent
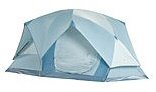
Several years ago, I gave a winning eBay bid of about $100 for a new 9x13', 2-room, Coleman Forester tent. It's been a great tent. It's spacious , it has enough headroom that I can stand (always a handy feature in a tent) and it has never leaked even while tents around us became wading pools.

I am sad that two segments of the center tent pole have cracked. The pole has 9 segments, connected by shockcord, and it has to bend 180° in about 17 feet. The third segment on each end is damaged. Apparently, it endures more stress in that position. Two other segments are a bit bent, but not cracked.
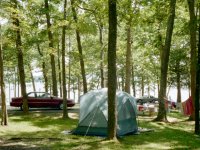
Coleman Forester tent Tenting at Kentucky Lake, 2003
I've tried to find a replacement pole because the tent body is still in pretty good shape. I couldn't find any replacement parts on the Coleman website so I called the customer service line. After all, Coleman is famous for offering replacement parts for their products.

The Coleman CSR confirmed that they have no parts for the Forester. She gave me the specifications of the pole and the telephone number of a firm that makes custom tent poles. I've tried calling but my every attempt ends with the error message, "Your call cannot be completed as dialed."

I've continued searching the internet hoping to find a replacement pole but so far, I haven't found anything that will work. While googling around, I've come across other accounts of cracked poles for the Coleman Forester. Those stories weren't around when I did a lot of research before buying the tent. I guess their pole problems developed over time, just as mine did.

Coleman Forester TentFun in the Forester
at Cumberland Falls, 2006

Today, I took out the shockcord in the broken pole and rearranged the segments so that the damaged ones are in a place where they won't have to bend as much. Then I wrapped them very well in duct tape. I also reinforced the segments that have been moved to the location that caused the cracking.

I don't know how long the repair will last, but it should be good for a few more trips. Maybe the body of the tent will eventually develop a zipper problem or something so I won't feel bad about junking it.

This evening, I found a promising website for replacement tent poles and I sent an inquiry. I also learned this evening that there are inexpensive pole splints for repairing broken tent poles. I may order several of them for the unlikely circumstance that the duct tape doesn't hold. I find myself unwilling to invest much money now that I have done a redneck repair job that will probably last a while.

I'm just guessing, but I wonder if problems with the center pole might be the reason that Coleman no longer has this particular tent. Next time I buy a tent, it won't have a pole that has to bend completely double like this one does. I might as well say that I won't buy a dome style tent because I think the 180° bend is the basis of their poling system.

I'm not complaining about the tent. Over the last four summers, I've used it quite a lot, and Keely has borrowed it several times for SCA as well. It's seen a lot of set-ups. We've definitely had $100 of use and enjoyment from it. Just a night or two spent in the tent instead of a motel made up the price. All in all, it's been a great tent, and if I didn't love it so much, I wouldn't be trying to fix it.


Coleman Forester Tent
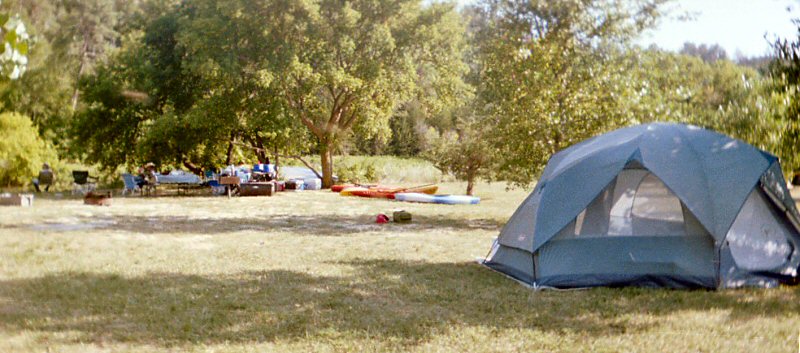
The Forester at the Niobrara River, 2004


Coleman Forester Tent
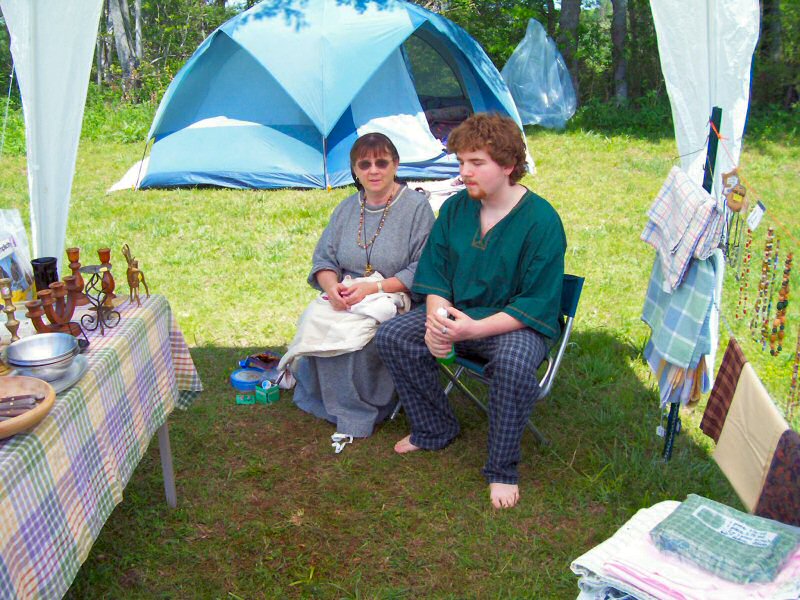
The Forester at an SCA event, 2006


- - - - - - - - - - - - - - - - - - - - - - - - -

Just everyone is doing torture in a tent -- An amusing read about the joys of pitching a tent.

- - - - - - - - - - - - - - - - - - - - - - - - -

Technorati tags:


Related Posts Plugin for WordPress, Blogger...

CONTENTMENT: Keep your heart free from hate, your mind from worry, live simply, expect little, give much, sing often, pray always, forget self, think of others and their feelings, fill your heart with love, scatter sunshine. These are the tried links in the golden chain of contentment.
(Author unknown)

IT IS STILL BEST to be honest and truthful; to make the most of what we have; to be happy with simple pleasure; and to be cheerful and have courage when things go wrong.
(Laura Ingalls Wilder, 1867-1957)

Thanks for reading.